Halloween Crafts 2023
10/24/2023
Ugh, I’m feeling the crunch. I knew trying to do four daily updates was going to just destroy me. I mean two of them were just images, and I had them finished before the month began, but the storyline and haunt reviews get taxing, especially over weekends when I need to preload three at once. I suppose falling behind with only a week to go isn’t the worst, but I did want to get some regular updates in before the season ended. A shame to have created the thematic banner and then not use it.
So let’s take a look at a few Halloween themed craft items that I will have varying degrees of success in assembling.
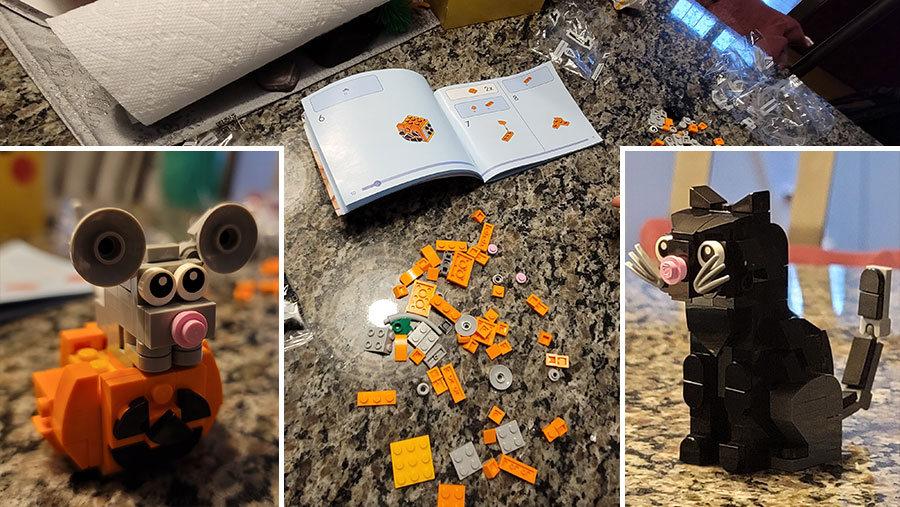
LEGO Halloween Cat & Mouse
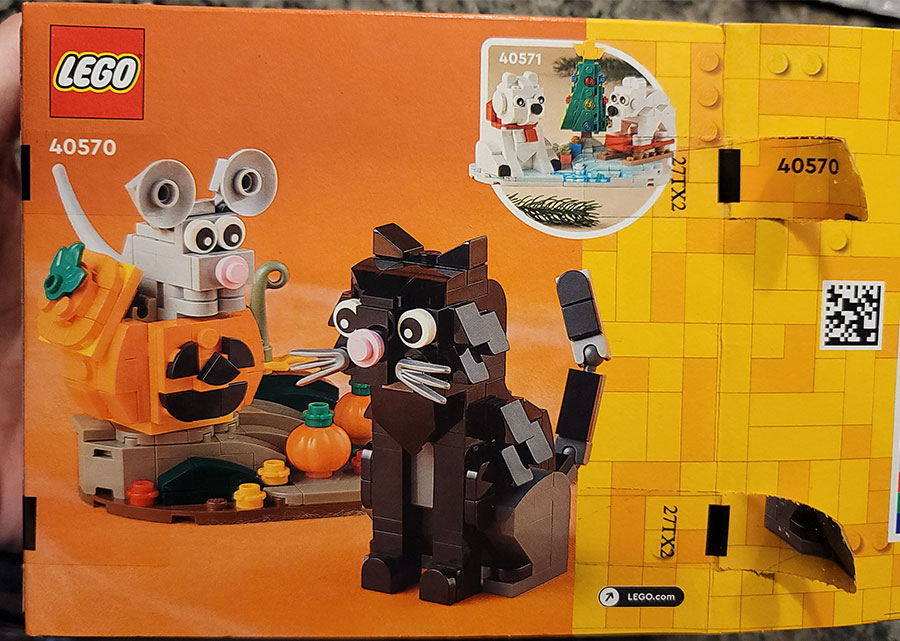
I’ll start off with something that I’m sure I can’t mess up too poorly. LEGO tends to end up exactly how you’d hope it would as long as you don’t drop one of the tiny 1x1 pieces down onto the shag rug, where it will never be seen again. It will be felt for sure when you’re barefoot and vulnerable, but you will still never see it. It will just be a painful reminder of the project that was never meant to be.
I had to pick this up, mainly because it was right for the season, but also because LEGO apparently costs more than the items they’re replicating, and I wanted to escape the mall visit with the least damage to my wallet as possible.
The instructions were mercifully short, and most of it involved repeating sections for the pumpkin walls. I do admit that there is a bit of imagination needed to make sense of the characters. The eyes and whiskers help to a degree, but when you’re using the raw LEGO primitives to create objects, things can get a little blocky. Then again, preformed pieces do take away from the nature of the brand, and likely helps reduce the piece of admission slightly below adopted a real live cat.

All said and done, it does resemble the product photo, as it should, but I did take a few liberties with the flower placement. What can I say? I’m a rebel at heart.
Eye Scream Truck

Next up is something I got at Michael’s or one of the other actual craft stores. It was one of the few that didn’t require you to actually paint or color the final result, so luck would certainly be in my favor. It also appeared to be made from somewhat sturdy poster board, another point towards my hopeful success.
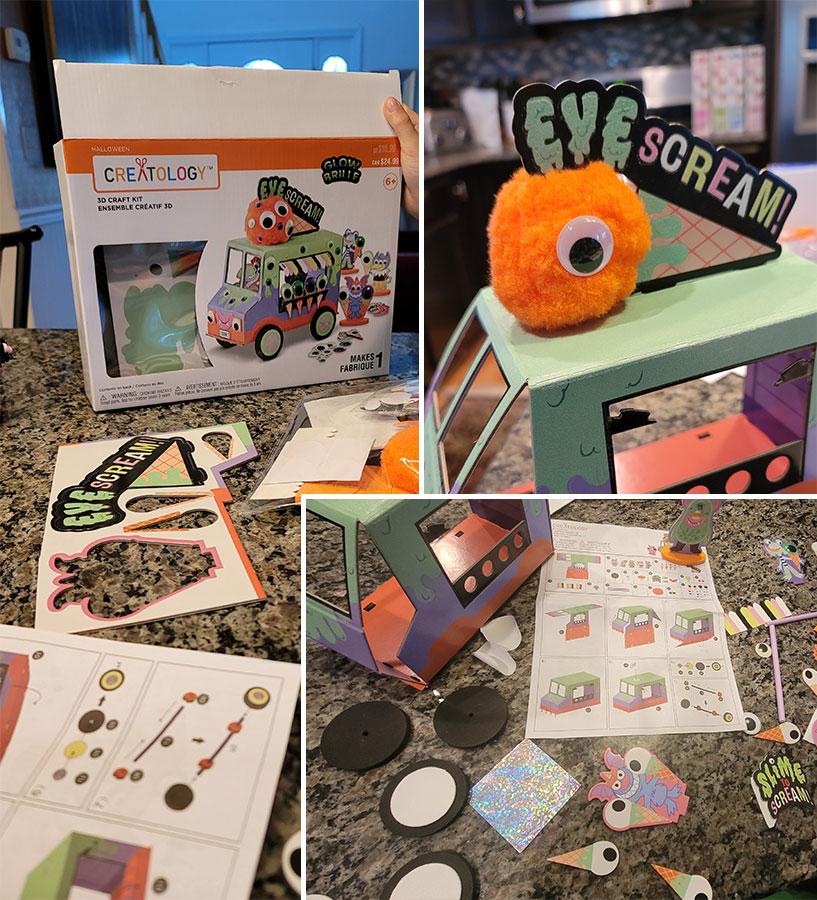
Good fortune continued once I got the package opened and was greeted by a straightforward set of instructions and a rather limited set of punchout sheets. A fair amount don’t appear to be part of the ice cream van, but rather staff and potential customers. The only somewhat complex part was the wheel segments, mainly because the foam had a bit too much ‘give’ and didn’t want to fit into the axle, which was also foam.
The other tricky part is keeping the main chassis in place. Since it’s folded, it has an eternal tendency to want to return to its flattened state no matter how much you plead. Crying an begging won’t work. Not for the ice cream man. Which brings me to the question about what’s so spooky about ice cream delivery that would warrant a spooky edition. I know there’s the clever play on words, but then I remembered the Ice Man HBO series, and we can then guess what the staff does to make a little extra on the side.

The final touch is to add googly eyes to everything including the pompom, which adheres about as well at you could expect. In truth, it isn’t so bad, but that’s mainly when compared to trying to get the ice cream cones to stay in their display slots. Think a square peg in a round hole is bad? Try a triangle at the wrong angle. It works about well enough for the photo, and little more. At least everyone seems happy. At least until little Guido doesn’t pony up the fifty cents, and gets a little visit after hours.
Model Magic Cat

Our progress is going too well, so it’s time to throw it for a spin. Model magic isn’t something I’ve dabbled with since 1993, and generally I have no problem with it. What is giving me a bit of concern is that glitter glue pen. My two faithful readers might recognize my apprehension when it comes to glitter. My many more unfaithful readers might shout vile heresies in my direction and remind me that glitter is neutralized when in glue, thus posing no risk. Well hold your condemnation of my mental character and just wait, because I’m betting the farm on the poor outcome, and based on the current housing market, that says something.
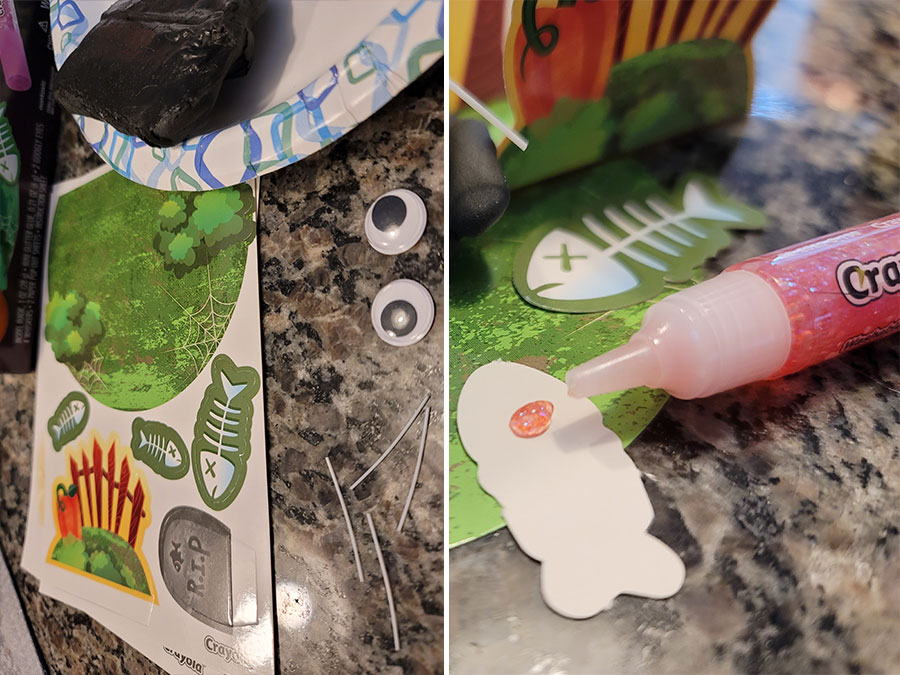
Again, we’re presented with some cardboard cutouts in which to assemble. However this time, there are no slots where the pieces fit together, however loosely. No, no, we have the accursed glitter glue to hold it all together. And unlike Elmer’s glue made from cow’s milk and horse’s feet, the clear glue takes way too long to congeal, so tacking anything other than a horizontal surface is sure to slide down and end up far from where you originally placed it.
I don’t even get the purpose of the glitter at this point anyway. It’s going to be hidden by the things that it doesn’t hold up. Or maybe it will be seen by virtue of its incompetence. There is another purpose for the glue, but it’s even worse, so buckle up.
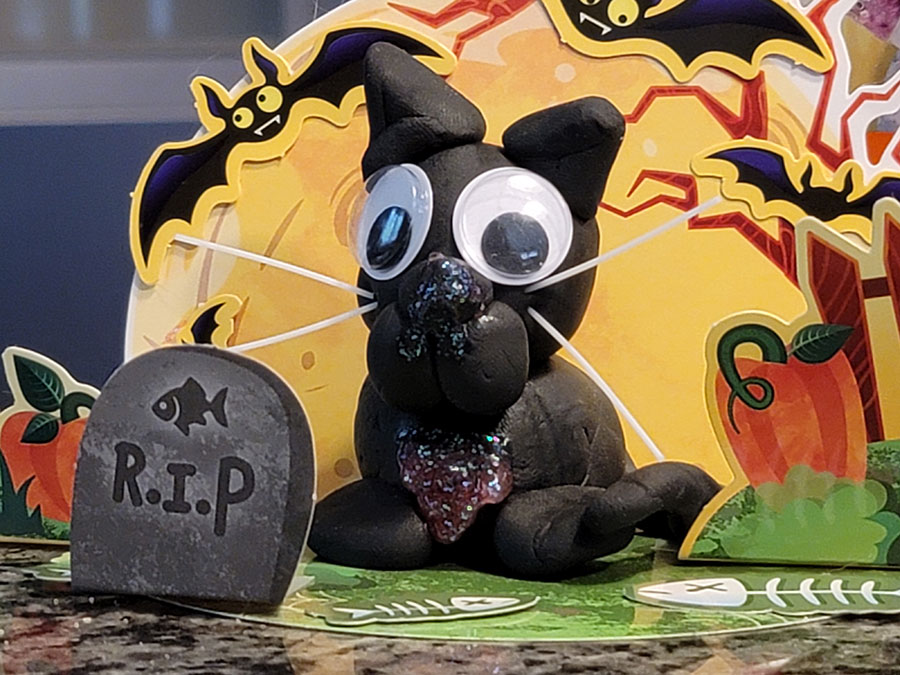
After rolling the model magic clumps into predefined ratios that are impossible to divvy up in actual practice, you must repeat the process a few times to get some sort of acceptable proportions. Then, and only then, can you stick them together and make a vague catlike shape. As you see, I didn’t redivvy enough times. Always redivvy!
Comically oversized googly eyes complete the look, and while it looks out of place and you may be tempted to question the steps outlined above, rest assured that no degree of perfection would result in a cat that would fit those eyes. It’s just not possible. Instead we’ll look at the glue, which was meant to add color detail, but stands no chance at being visible against the midnight backdrop. Instead it does its usual performance of dripping downward like sneezing in a Claire’s boutique.

And there’s the final result. The fence and pumpkin props only stayed up for the photo before unfurling into their two-dimensional state. I also just realized that I put the whiskers in the cat’s face instead of it’s snout. This one had no hope, so let’s jump to the last item.
BLOCKS!!! Haunted House
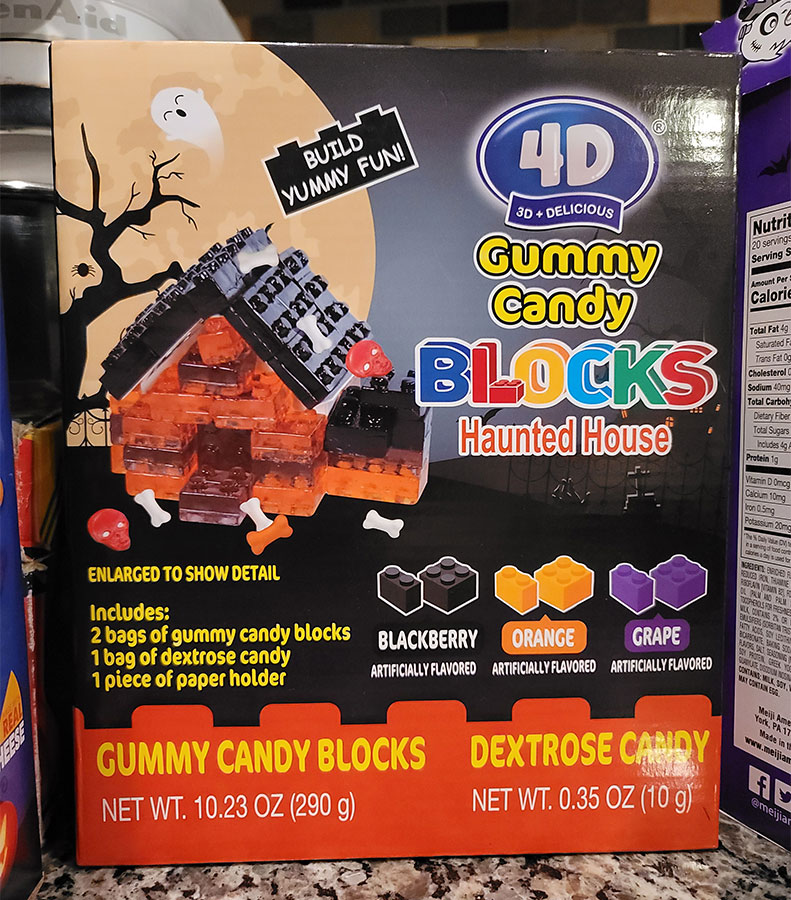
I wasn’t sure if I wanted to add this one here, or save it for the food-related update. It’s sort of half and half, but at this rate, I’m either going to scrap the forthcoming article due to lack of content or combine it with the images I took this year. Either way, I think this will be fine here as it is sort of more craft related and I certainly won’t be eating it.
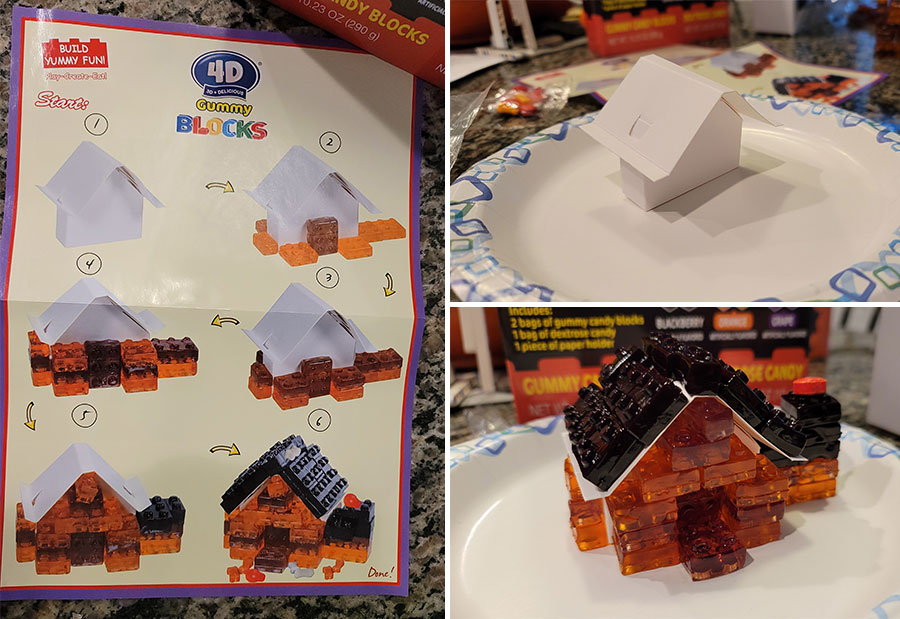
There’s no sense going into vile detail, so we get some of those stackable gummi Not-LEGO TM blocks that generally only fit together not because of the indentations, but the slime and corn syrup that will soon be sticking to your gullet all the same. A paper frame for the house is provided and works quite well enough for the procedure. It does end up showing a bit by the latter stages, so the purity of the gummi structure is compromised a bit.
A helpful step by step guide helps in any case, mirroring genuine LEGO manuals, even if said instructions are just akin to: putting things next to each other. The last step infers that the random decorations are just skattered about. I’m not sure if it’s in a haphazard manner, or if you need to be exact. You don’t want to play loose and goose with haunted house or Mr. Boogedy will pay a visit. Then again, his rubber slime footprints won’t really have an effect not will they. We won this round, but failed in most others. Til next time…